After weeks of wiring changes, controller upgrades, tilt adjustments, and chasing shadows across the roof, the solar system finally delivered the kind of performance the theory always promised. Mid‑February in Winterhaven, CA isn’t supposed to be peak solar season, yet the last two days produced 7,250 watt‑hours and 7,513 watt‑hours, with the batteries topping off by afternoon. These numbers confirm that the system is now operating close to its true 1,540‑watt potential.
Matching the Theory With Real‑World Results
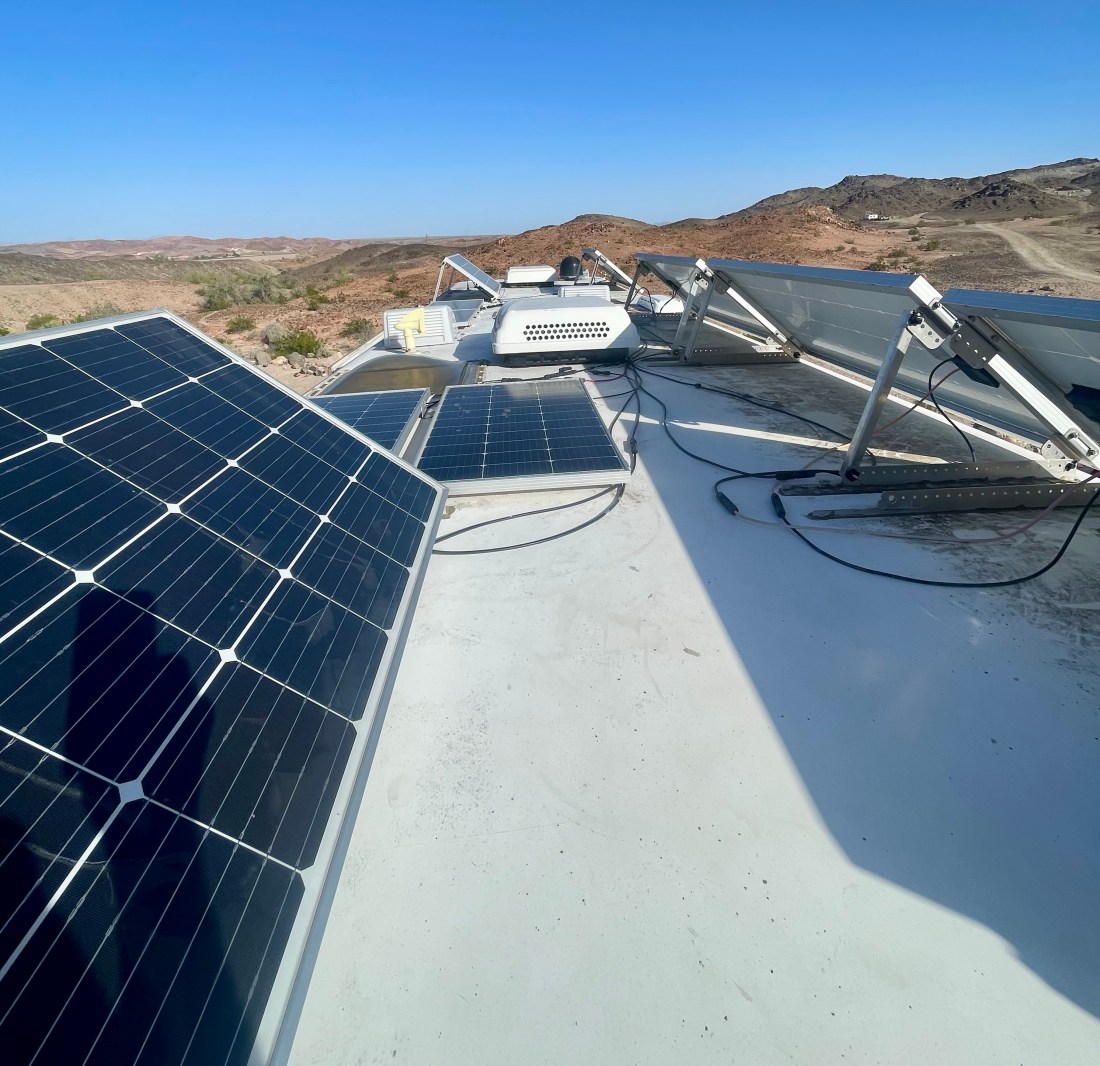
The array consists of:
- 2 × 210‑watt panels (420 W)
- 4 × 180‑watt panels (720 W)
- 4 × 100‑watt panels (400 W)
Totaling 1,540 watts, the theoretical February harvest in Winterhaven—using roughly 5.5 peak sun hours—lands around 8.47 kWh. Hitting 7.2–7.5 kWh in real conditions puts the system at 85–89% of theoretical output, which is exceptional for winter sun, real‑world temperatures, wiring losses, and the inevitable shading challenges of an RV roof.
These numbers aren’t guesses or projections—they’re the result of actual harvest data over multiple days, and they validate the design decisions made along the way.
The Fourth Controller: The Turning Point
The biggest leap in performance came from adding a fourth solar controller. This upgrade allowed each array to operate independently, eliminating the compromises that come from mixing panel sizes, voltages, and shading profiles on shared controllers.
With the new layout:
- The 210‑watt pair now runs in full series on the Victron MPPT 100/30, reaching clean high‑voltage operation and pulling peaks up to 2.1 kW.
- The 4 × 180‑watt array runs as a matched series string on its Blue Sky controller, exactly as designed.
- The 4 × 100‑watt panels were moved to their own controller, freeing them to be rewired for shading tolerance without affecting the rest of the system.
This separation eliminated the clipping that previously held the system back. Each controller now tracks its own array without interference, and the results show it.
Before and After: A System Transformed
Before
- Mixed arrays sharing controllers
- Voltage mismatches causing early clipping
- Shading on the 100‑watt panels dragging down entire strings
- Tilt set “by eye,” leaving watts on the table
- Roof real estate feeling like a puzzle with no clean solution
After
- Four independent MPPT controllers
- All major arrays running in clean series strings
- The 100‑watt array rewired in parallel to isolate shading
- Tilt optimized using the app for maximum winter performance
- Batteries topping off in mid‑February
- Daily harvests consistently above 7 kWh
The transformation is visible not just in the numbers, but in how predictably the system now behaves. The theory said this configuration should work—and the real‑world data now confirms it.
One of the ongoing issues was the potential for a voltage drop issue, I know it is not a serious issue but it is still an issue. All controllers were removed and reinstalled to shorten all of the wiring. Now all PV cables from the roof are 10 gauge solar wire, each solar feed has a 40 amp circuit breaker (as protection and a way to control the circuit) each battery power line has been upgraded to 6 gauge wire with new crimped cable ends to a 50 amp fuse and then to a bus bar that combines all the power and ground lines into 00 gauge wire to the battery on both positive and negative lines. the 00 gauge wires are my longest wires, so I’m thinking the voltage drop issue should be resolved.
What’s Left for Stage 3
The system is now functionally complete and performing at a level that matches its design. The remaining tasks are refinements:
- Making the 4 × 100‑watt array tippable
- Eliminating the last sources of morning and afternoon shading
- Returning the 100‑watt array to a series/parallel configuration once shading is resolved
- Finalizing roof placement now that performance data is guiding the decisions
These aren’t fixes—they’re optimizations aimed at squeezing out the last few percent of performance.
Day 3076