🌵 Imperial Dam LTVA: The Ultimate Guide for Extended Desert Camping
Imperial Dam Long Term Visitor Area (LTVA) is one of the premier desert boondocking and snowbird camping areas in the Southwest. Managed by the Bureau of Land Management (BLM), this long-term visitor site sits near Yuma, Arizona / Winterhaven, California and offers a unique desert camping experience with access to lakes, river recreation, and iconic Southwestern views.
📍 Location & GPS Coordinates
- Imperial Dam LTVA
- Latitude: 32.901256
- Longitude: -114.495431
This places it on the California side of the Colorado River, north of Yuma.
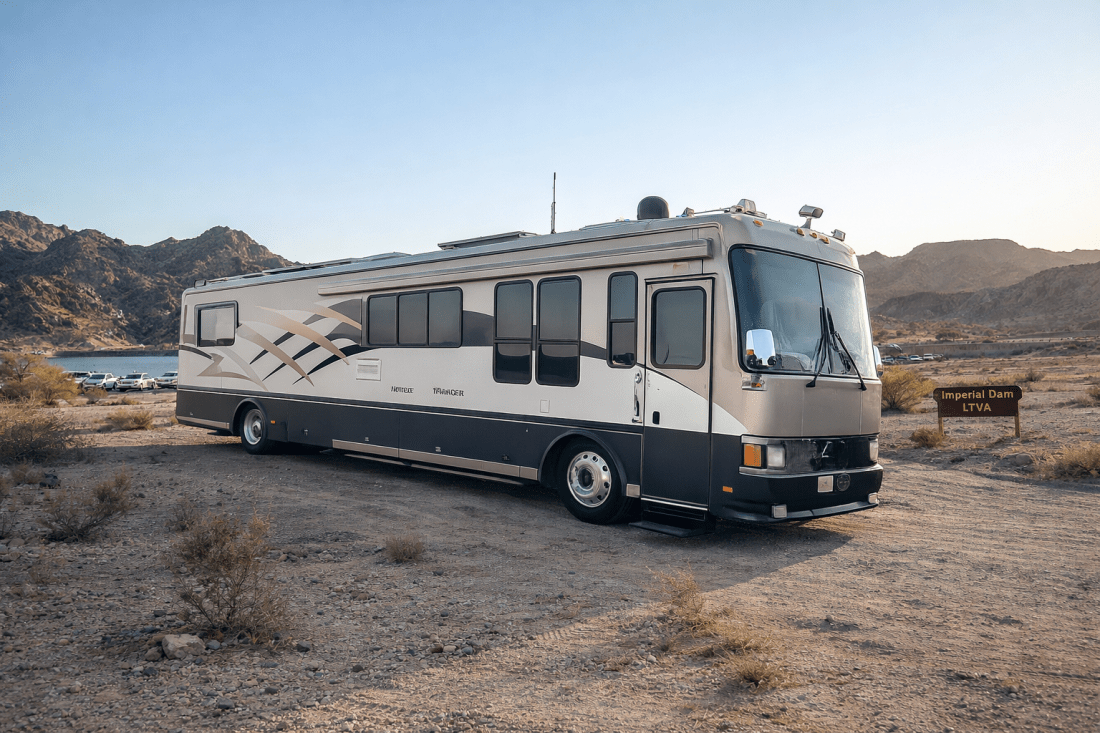
🏕️ What It’s Like
Imperial Dam LTVA covers roughly 3,500 acres of flat desert terrain — dotted with creosote bushes, palo verde, mesquite, ironwood trees, and native cacti typical of the Sonoran Desert. The landscape is mostly flat and open, which makes it ideal for RVs, tents, and boondocking with plenty of space between neighbors.
💦 Amenities at the Site
On-Site Services
- Multiple dump stations (including black/grey water).
- Several potable water stations.
- Restrooms & outdoor showers near admin areas.
- Trash dumpsters serviced regularly.
- Ramadas and open day-use areas for shade.
- Boat launch access & nearby fishing opportunities on lakes and the Colorado River.
⚠️ This is still primarily boondocking. Most individual campsites are not marked, and many do not have full hookups. Plan to be self-sufficient.
💰 Fees: Current (2025–26) & Projected
Running Season (Sep 15 – Apr 15)
- Long-Term Permit: $180 — valid for up to 7 months anywhere in BLM’s LTVAs.
- Short-Visit Permit: $40 — valid for 14 consecutive days (with unlimited renewals).
Off-Season (Apr 16 – Sep 14)
- Day Use: $10/vehicle
- Overnight: $15/vehicle
- Annual Pass (vehicle): $75
🪪 Projected future changes: Fees historically remain stable; occasional minor increases are proposed by BLM business plans (subject to federal recreation fee reviews). No official 2026 fee increases published yet — check official BLM updates before planning.
☀️ Weather & Seasonal Temperatures
Imperial Dam sits in one of the sunniest, driest deserts in the U.S., near Yuma — frequently ranked among the most sunshine-filled cities.
🌤️ Fall (Sept – Nov)
- Daytime: 80–100°F and cooling into the 80s by November.
- Nights: Generally 60s–70s°F.
- Great weather for hiking, boating, and outdoor activities.
❄️ Winter (Dec – Feb)
- Highs: 60s–70s°F — mild and very popular with snowbirds.
- Lows: 40s–50s°F at night.
- Rare freezes — generally comfortable.
🌼 Spring (Mar – May)
- Highs: 70s–90s°F early, warming into 90s by May.
- Nights: 50s–60s°F.
☀️ Summer (Jun – Aug)
Very hot: highs often >100°F — not recommended for long stays unless prepared for extreme heat.
Rainfall is minimal (around ~3″ annual), with some summer monsoon and occasional occasional storms in late summer.
🚗 How to Get There
From Interstate 8 (I-8)
- Take Exit 9 (S-24 / Yuma Road) north.
- Head north ~22 miles on S-24.
- Turn left onto Senator Wash Road.
- Continue ~2 miles to the Imperial Dam LTVA entrance.
From Interstate 10 (I-10)
- Head south on US-95 toward Yuma, then turn right on Senator Wash Road and follow the directions above.
🧭 Nearby Attractions & Services
Outdoor Recreation
- Imperial National Wildlife Refuge – unique birding/wildlife habitat close by.
- Senator Wash Reservoir & Imperial Reservoir – fishing & paddling.
City Conveniences
- Yuma, AZ – groceries, RV services, restaurants, medical, and entertainment. ~30–40 min drive.
📌 Tips for Campers
✔ Bring extra water and fuel — desert environment is remote.
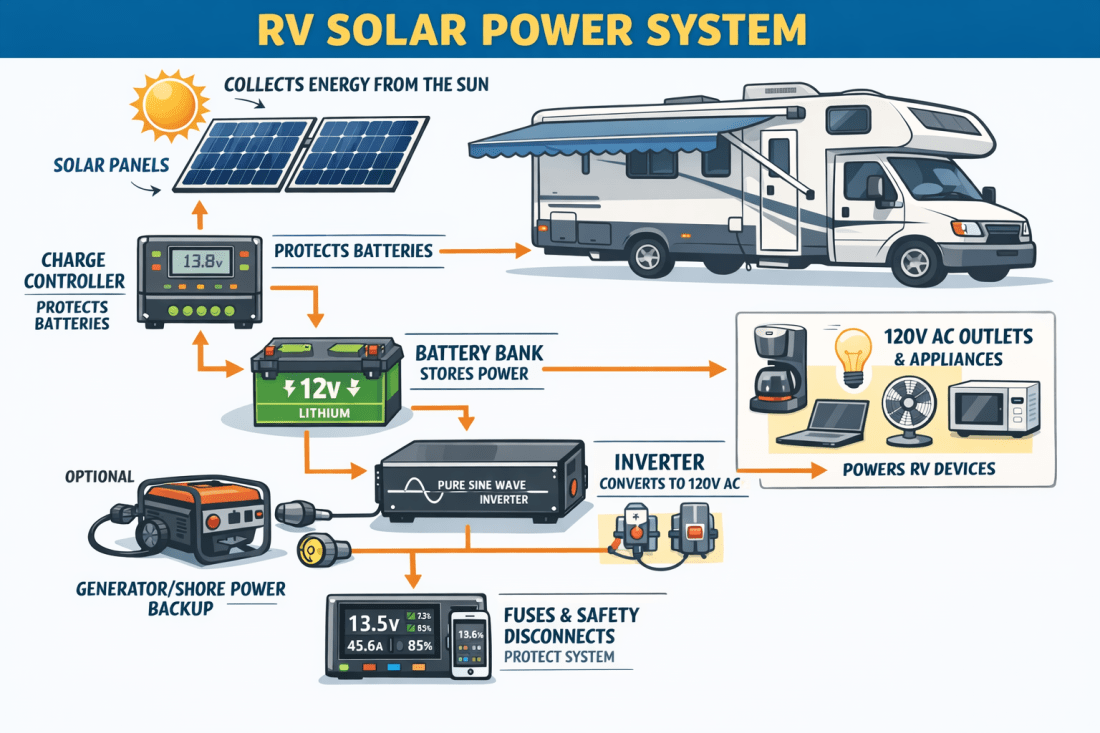
✔ Solar or generator power recommended — few hookups except dump/water points.
✔ Observe “pack it in, pack it out” — no permanent fire rings; keep area clean.
✔ Birders will find seasonal species tracking through the Colorado River corridor.
🧡 Summary
Imperial Dam LTVA is a must-visit spot for snowbirds, RVers, and desert lovers, especially in winter and spring. With affordable long-term permits, basic amenities, and spectacular Southwestern scenery, it’s one of the best desert camping areas managed by the BLM. Whether you’re boondocking for months or just passing through, this campsite offers both solitude and access to rivers, lakes, and wide-open landscapes.
Day 3065